Python Component in Revit
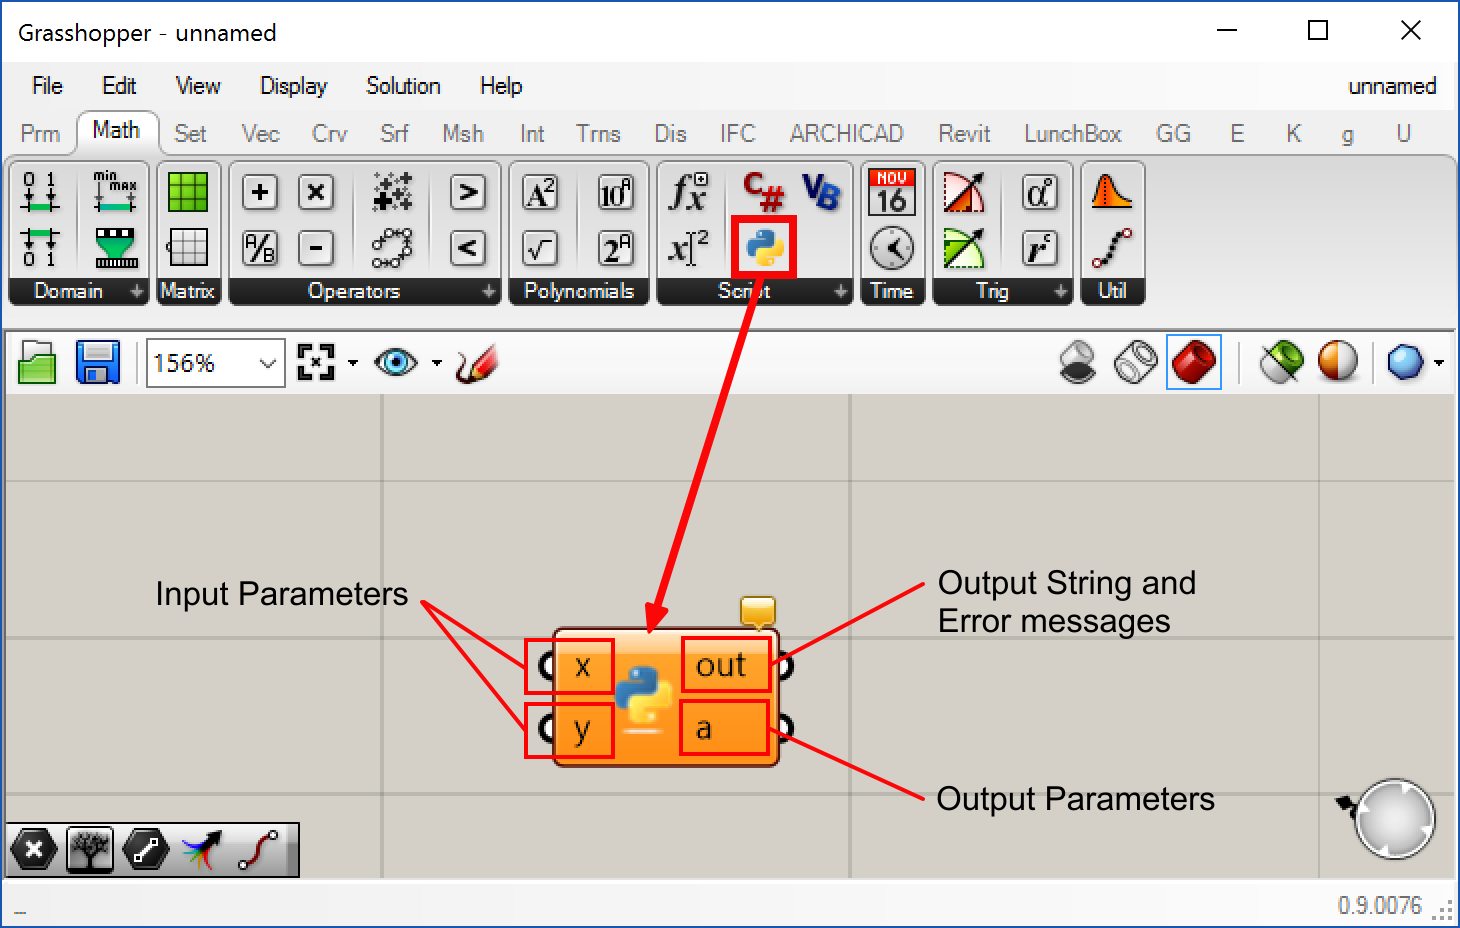
Grasshopper has three scripted components. One for python (IronPython to be specific) programming language and another two for VB.NET and C#. These scripted components allows a user to create custom logic for a Grasshopper component. The component, therefore, can accept a configurable number of input and output connection points.
Since Rhino.Inside.Revit project brings Rhino and Grasshopper into the Autodesk Revit® environment, the scripted components also get access to the Revit API runtime. In this article we will discuss using the python component to create custom components for Revit.
Setting Up
When adding a new python component into the Grasshopper definition, you will get the default imports:
"""Provides a scripting component.
    Inputs:
        x: The x script variable
        y: The y script variable
    Output:
        a: The a output variable"""

__author__ = ""
__version__ = ""

import rhinoscriptsyntax as rs
In order to access the various APIs we need to import them into the script scope first. To access Revit and Rhino.Inside.Revit we need to first import the CLR (Common-Language-Runtime) module in python and use that to add the necessary library references:
# Common-Language-Runtime module provided by IronPython
import clr

# add reference to base system types e.g. Enum
clr.AddReference('System.Core')

# add reference to API provided by Rhino.Inside.Revit
clr.AddReference('RhinoInside.Revit')

# add reference to Revit API (two DLLs)
clr.AddReference('RevitAPI')
clr.AddReference('RevitAPIUI')
Now we can import the namespaces into the script scope:
# from System.Core DLL
from System import Enum, Action

# Rhino.Inside.Revit API
import RhinoInside
from RhinoInside.Revit import Revit, Convert

# add extensions methods as well
# this allows calling .ToXXX() convertor methods on Revit objects
clr.ImportExtensions(Convert.Geometry)

# Revit API
from Autodesk.Revit import DB
from Autodesk.Revit import UI
Custom User Component
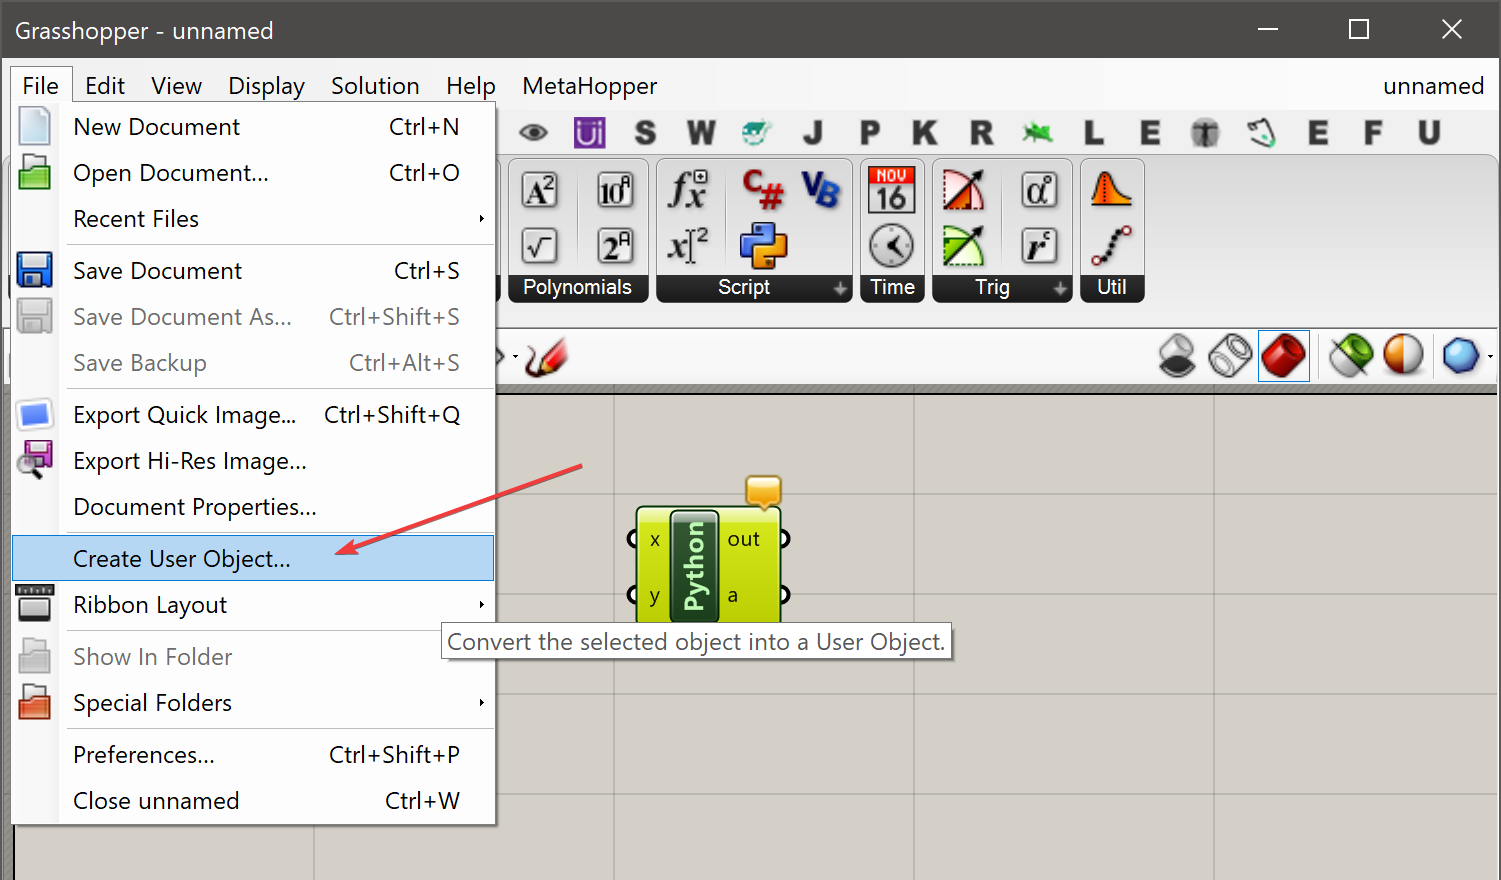
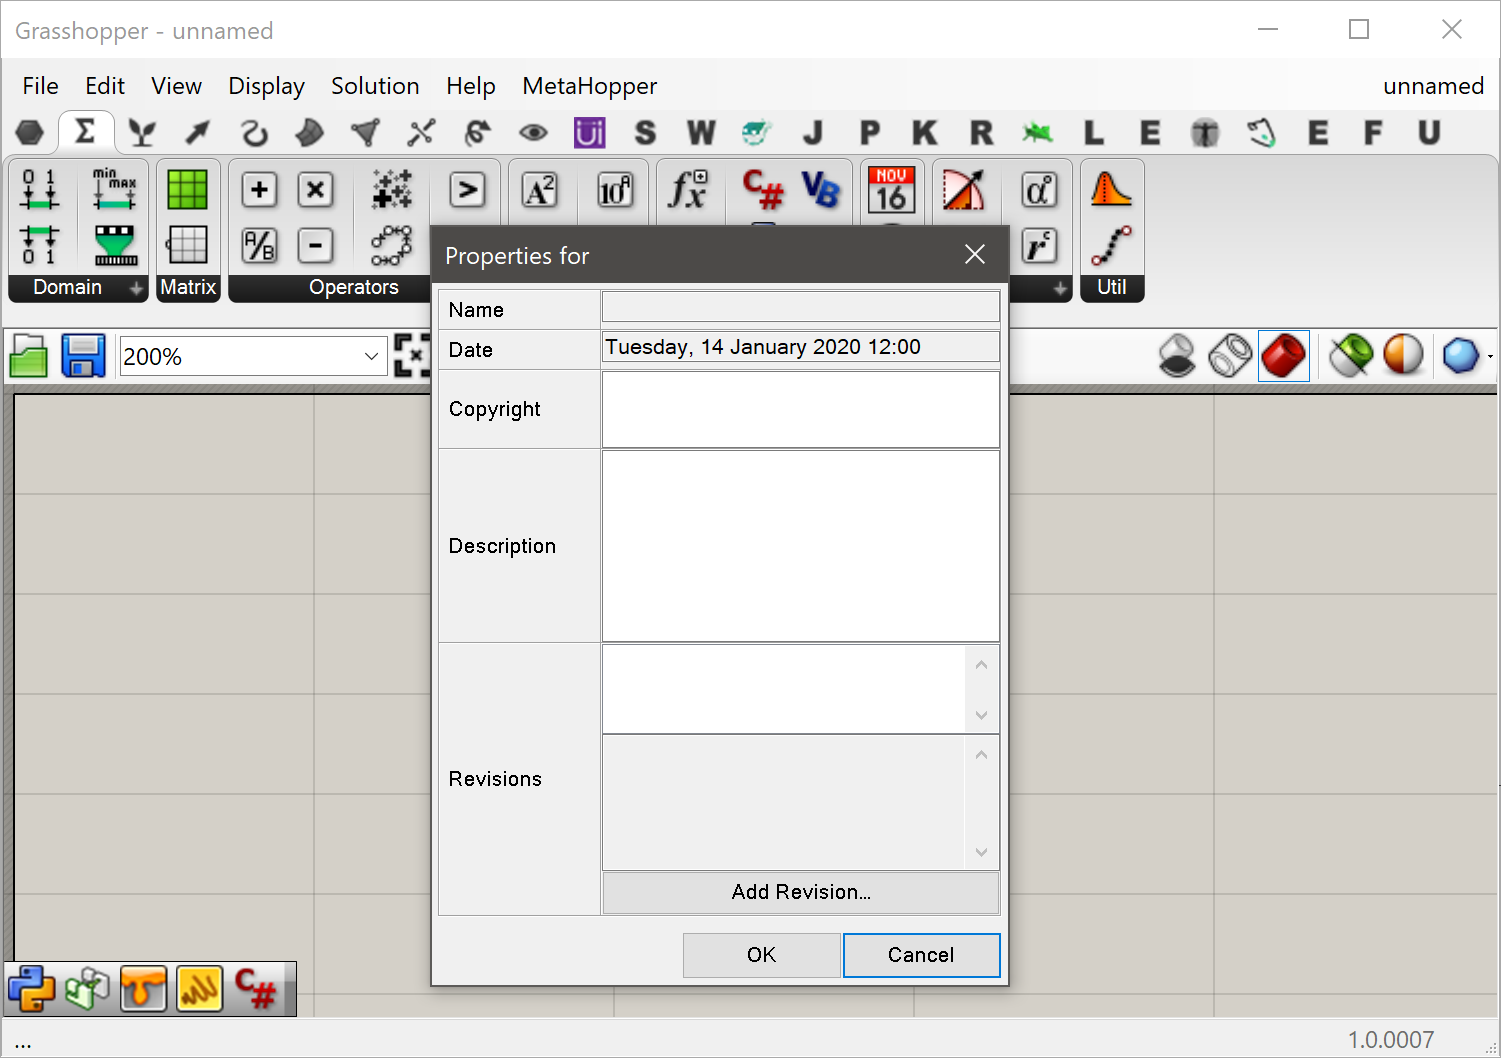
Since the imports mentioned above need to be done for every single python component, the process can get tedious. You can setup a template python component with a default script importing all the most frequently used APIs and save that as a User Component in Grasshopper:
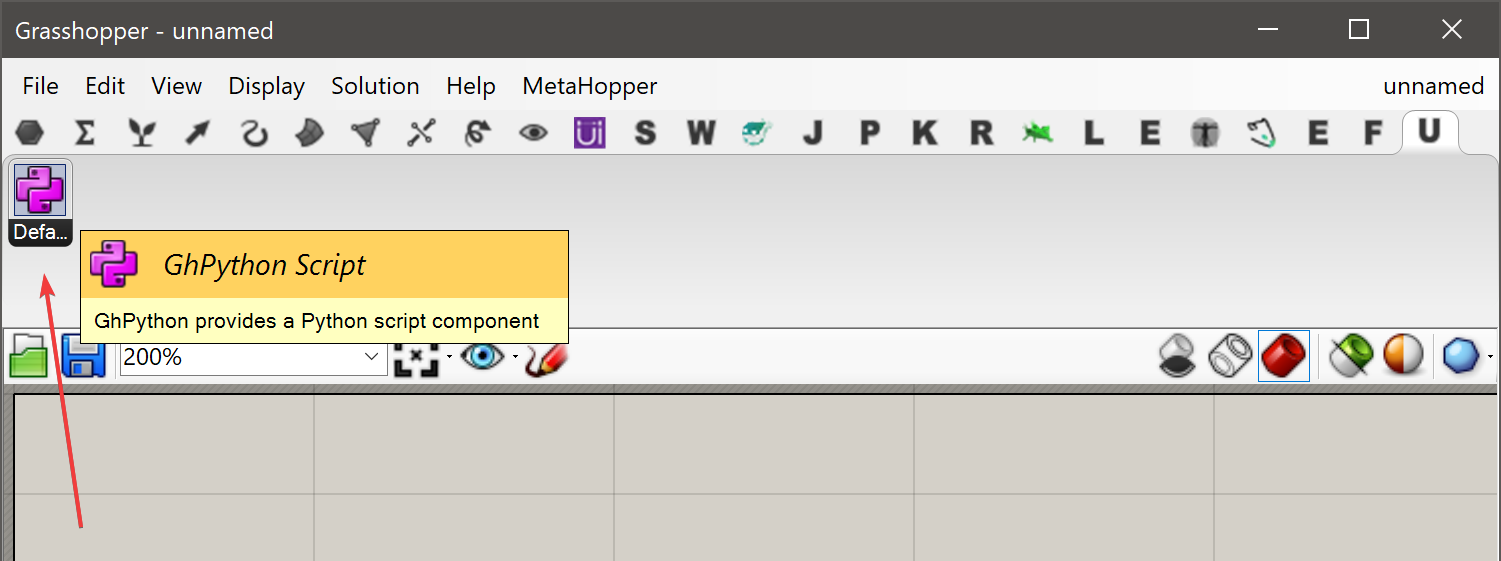
After the user object has been created, you can easily create a new python component from the user object and it will have the template python script with all your default imports:
Here is a template script that covers most of the use cases:
import clr
clr.AddReference('System.Core')
clr.AddReference('RhinoInside.Revit')
clr.AddReference('RevitAPI')
clr.AddReference('RevitAPIUI')

from System import Enum, Action

import rhinoscriptsyntax as rs
import Rhino
import RhinoInside
import Grasshopper
from Grasshopper.Kernel import GH_RuntimeMessageLevel as RML
from RhinoInside.Revit import Revit, Convert
# add extensions methods as well
# this allows calling .ToXXX() convertor methods on Revit objects
clr.ImportExtensions(Convert.Geometry)
from Autodesk.Revit import DB

# access to Revit as host
REVIT_VERSION = Revit.ActiveUIApplication.Application.VersionNumber
# access the active document object
doc = Revit.ActiveDBDocument

# a few utility methods
def show_warning(msg):
    ghenv.Component.AddRuntimeMessage(RML.Warning, msg)

def show_error(msg):
    ghenv.Component.AddRuntimeMessage(RML.Error, msg)

def show_remark(msg):
    ghenv.Component.AddRuntimeMessage(RML.Remark, msg)

# write your code here
# ...
You can download the User Object for this template from this button:
 GhPython Script
Place under Grasshopper User Objects folder. Find in Revit > Custom panel
Example
This example component will create a sphere of an adjustable radius in Revit and Rhino. It will pass that sphere onto other Grasshopper components through the output and it will create the sphere in Revit and bake into Rhino if the button connected to the input is pressed.

As you see in the image above, we have renamed the input components and also the input and output parameters on the python components. This is a really good practice and it makes the definition a lot more clear to a new user.
Once this foundation is ready, then we can continue to create the script.
Creating Sphere Geometry
To show how a geometry that is created in Grasshopper, previews in both Rhino and Revit dynamically we will use the script below. This script will create a sphere based on the Radius input value:
import clr
clr.AddReference('System.Core')
clr.AddReference('RhinoInside.Revit')
clr.AddReference('RevitAPI')
clr.AddReference('RevitAPIUI')

from System import Enum, Action

import rhinoscriptsyntax as rs
import Rhino
import RhinoInside
import Grasshopper
from RhinoInside.Revit import Revit, Convert
from Autodesk.Revit import DB

doc = Revit.ActiveDBDocument

Sphere = Rhino.Geometry.Sphere(Rhino.Geometry.Point3d.Origin, Radius)
The Sphere() method is from the Rhino.Geometry namespace and is part of the RhinoCommon API.
By setting the output to Sphere Grasshopper will preview the results in both Rhino and Revit (Grasshopper is smart to know that some geometry is set on the output parameter). It also allows the Preview option on the component to be toggled and the sphere geometry to be passed down to the next component.
Now we can change the slider value to adjust the radius. Make sure the slider values are set to a big-enough value to the resulting sphere is visible in your Revit and Rhino models.
Baking to Revit and Rhino
We can add a custom baking function in this script. This can serve as a template to almost an unlimited number of ways and elements that one might want to create Revit objects from Grasshopper.
Because baking objects to Revit can take a long time and many times only should be done once, this bake function will only execute if the Trigger input is set to True on the component. This way we can decide to bake the object once we are happy with the results.
First, let’s create a bake function:
def create_geometry(doc):
    # convert the sphere into Brep
    brep = Sphere.ToBrep()

    # now let's pick the Generic Model category for
    # our baked geometry in Revit
    revit_category = DB.ElementId(DB.BuiltInCategory.OST_GenericModel)

    # Finally we can create a DirectShape using Revit API
    # inside the Revit document and add the sphere brep
    # to the DirectShape
    ds = DB.DirectShape.CreateElement(doc, revit_category)
    # we will use the .ToSolid() extension method to convert
    # Rhino Brep to Revit Solid. Then we will add the solid to
    # the directshape using the .AppendShape() method
    ds.AppendShape([brep.ToSolid()])
Once we are done creating this function, we can modify the script to listen for the trigger and call this function.
 |
All changes to the Revit model need to be completed inside a Transaction. To facilitate this, Rhino.Inside.Revit provides the |
if Trigger:
    Revit.EnqueueAction(
        Action[DB.Document](create_geometry)
    )
And here is the complete sample code:
import clr
clr.AddReference('System.Core')
clr.AddReference('RhinoInside.Revit')
clr.AddReference('RevitAPI')
clr.AddReference('RevitAPIUI')

from System import Enum, Action

import rhinoscriptsyntax as rs
import Rhino
import RhinoInside
import Grasshopper
from RhinoInside.Revit import Revit, Convert
from Autodesk.Revit import DB

clr.ImportExtensions(Convert.Geometry)
from Autodesk.Revit import DB

doc = Revit.ActiveDBDocument

def create_geometry(doc):
    brep = Sphere.ToBrep()
    revit_category = DB.ElementId(DB.BuiltInCategory.OST_GenericModel)
    ds = DB.DirectShape.CreateElement(doc, revit_category)
    ds.AppendShape([brep.ToSolid()])

Sphere = Rhino.Geometry.Sphere(Rhino.Geometry.Point3d.Origin, Radius)

if Trigger:
    Revit.EnqueueAction(
        Action[DB.Document](create_geometry)
    )
Handling Transactions
To effectively create new transactions and handle the changes to your model in Grasshopper python components, use the with pattern example below:
# create and start the transaction
with DB.Transaction(doc, '<give a descriptive name to your transaction>') as t:
    t.Start()
    # change Revit document here
    # commit the changes after all changes has been made
    t.Commit()
Inspecting Revit
To inspect which version of Revit you are using, use the REVIT_VERSION global variable provided in the template script above. See example below:
REVIT_VERSION = Revit.ActiveUIApplication.Application.VersionNumber

if REVIT_VERSION == 2019:
    # do stuff using Revit 2019 API
else:
    # do other stuff
Node In Code
You can also use the Grasshopper components that you love, inside your code, as functions and therefore create much more complex and powerful scripted components without writing the necessary complicated codes. The Grasshopper components basically become like powerful library functions that help you get your job done and have a smaller script to maintain. Here is what you need to add to use the Grasshopper components in your code. First we need to import the Node-in-Code handle:
from Rhino.NodeInCode import ComponentsNow you can access the component, like a function. These function names are prefixed with the name of their Grasshopper plugin to avoid naming conflicts. The example below shows how we can access the
 Add Material
inside the code:
Add Material
inside the code:
Components.NodeInCodeFunctions.RhinoInside_AddMaterial()

# alternatively you can use a finder function to find
# the component by name.
comp = Components.FindComponent("RhinoInside_AddMaterial")
# and call the .Invoke function
comp.Invoke()
Now lets put this knowledge into use and create a custom scripted component that imports a Brep geometry into Revit and assigns a material to it. This scripted component effectively combines 3 different Grasshopper components into one. Note that there are obviously easier ways to do the same task, however this is a simple example of how components can be chained together in a script.
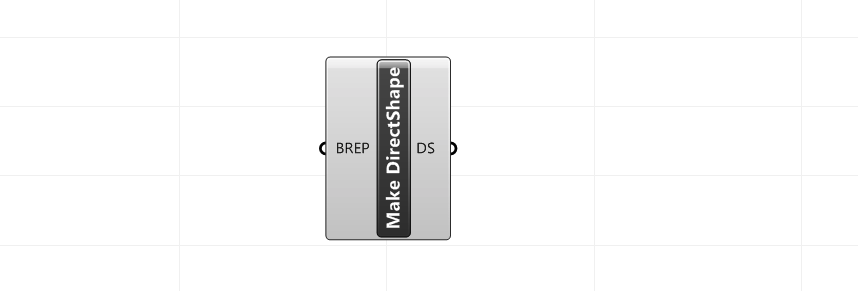
We will start with the template script component that we created above. Add it to your Grasshopper definition and modify the variable parameters to make it look like this:
Let’s find our components first, and notify the user if any of them does not exist.
# AddMaterial component to create a material
add_material = Components.FindComponent("RhinoInside_AddMaterial")
# and AddGeometryDirectShape to create a DirectShape element in Revit
add_geom_directshape = Components.FindComponent("RhinoInside_AddGeometryDirectShape")
Let’s also notify the user if any of these components do not exist:
if not (add_material and add_geom_directshape):
    show_error("One or more of the necessary components are not available as node-in-code")
Now let’s create the main logic of our script:
# create a color object. modify the logic as you wish
color = System.Drawing.Color.FromName("DeepSkyBlue")

# now create the material using the node-in-code
# note that just like the Grasshopper component, the node-in-code also
# takes 3 inputs in the exact same order (top to bottom)
new_materials = add_material.Invoke("Sky Material", True, color)

# and now use the AddGeometryDirectShape node-in-code to
# create the DirectShape element in Revit
# Notes:
#    - BREP is our input Brep object
#    - new_materials is a list of new materials so we are grabbing the first element
#    - get_category is a function that finds a Revit category from its name
ds_elements = add_geom_directshape.Invoke(
    "Custom DS",
    get_category("Walls"),
    BREP,
    new_materials[0]
    )

# assign the new DirectShape element to output
DS = ds_elements[0]
And here is the complete script:
import clr
clr.AddReference('System.Core')
clr.AddReference('RhinoInside.Revit')
clr.AddReference('RevitAPI')
clr.AddReference('RevitAPIUI')

import System
import Rhino
from Grasshopper.Kernel import GH_RuntimeMessageLevel as RML

# bring in the node-in-code handle
from Rhino.NodeInCode import Components

# Revit API
from Autodesk.Revit import DB

from RhinoInside.Revit import Revit

def show_warning(msg):
    ghenv.Component.AddRuntimeMessage(RML.Warning, msg)

def show_error(msg):
    ghenv.Component.AddRuntimeMessage(RML.Error, msg)

def show_remark(msg):
    ghenv.Component.AddRuntimeMessage(RML.Remark, msg)

def get_category(category_name):
    doc = Revit.ActiveDBDocument
    for cat in doc.Settings.Categories:
        if cat.Name == category_name:
            return cat


# AddMaterial component to create a material
add_material = Components.FindComponent("RhinoInside_AddMaterial")
# and AddGeometryDirectShape to create a DirectShape element in Revit
add_geom_directshape = Components.FindComponent("RhinoInside_AddGeometryDirectShape")

if not (add_material and add_geom_directshape):
    show_error("One or more of the necessary components are not available as node-in-code")

if BREP:
    # create a color object. modify the logic as you wish
    color = System.Drawing.Color.FromName("DeepSkyBlue")

    # now create the material using the node-in-code
    # note that just like the Grasshopper component, the node-in-code also
    # takes 3 inputs in the exact same order (top to bottom)
    new_material = add_material.Invoke("Sky Material", True, color)

    # and now use the AddGeometryDirectShape node-in-code to
    # create the DirectShape element in Revit
    # note that BREP is our input Brep object
    ds_elements = add_geom_directshape.Invoke(
        "Custom DS",
        get_category("Walls"),
        BREP,
        new_material[0]
        )

    # assign the new DirectShape element to output
    DS = ds_elements[0]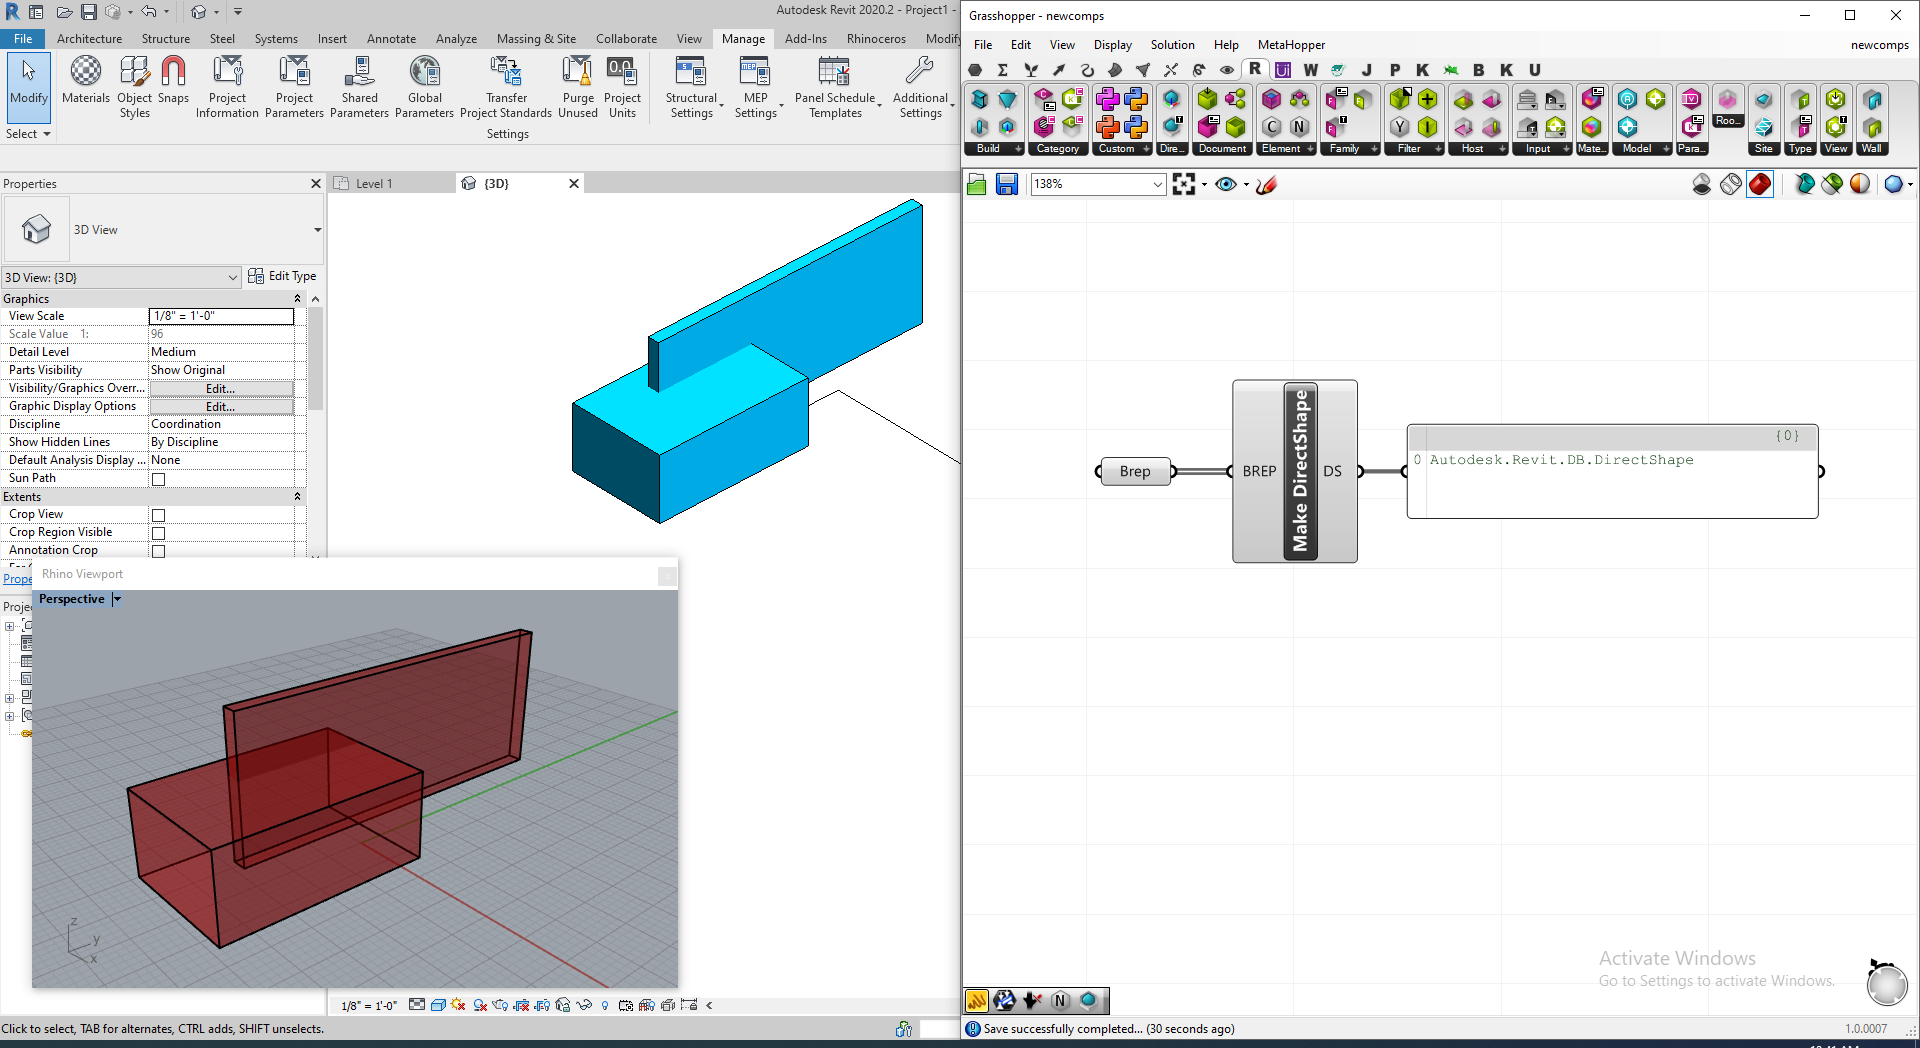
Additional Resources
Here are a few links to more resources about all the APIs mentioned here: