Rhino.Inside.Revit Interface
Loading Rhino.Inside.Revit
One Revit is loaded, click on the Start button under Revit > Rhino.Inside tab to load the Rhino.Inside.Revit

Start Button Click Modes
- Ctrl
→ Click
Launches the Rhino about window that shows the exact version number
- Ctrl
- Shift
→ Click
Launches the debug info collector window. See Submitting Debug Info under Troubleshooting
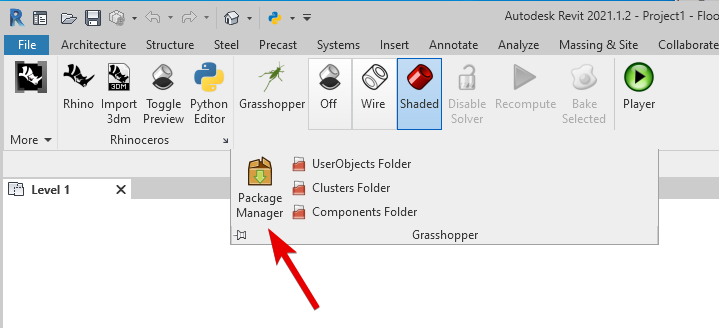
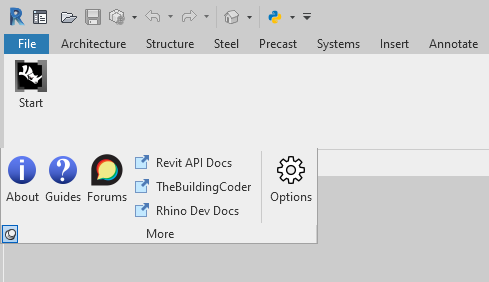
“More” Slideout
There is a slideout under the Start button that contains informational tools and the Rhino.Inside.Revit Settings
Rhino.Inside.Revit Tab
Once Rhino.Inside.Revit is loaded and Rhino is licensed, it creates a new panels under the Rhino.Inside tab

Here is a description of the buttons and functionality available on this ribbon.
Rhinoceros Panel

|
Rhino | The Rhino icon will start Rhino to run inside Revit. Grasshopper can also be run from within that Rhino instance |
→ Click: Launches Rhino window only |
||
|
Import 3DM | Import Rhino 3dm files into Revit |
|
Open Viewport | Opens a floating Rhino viewport. |

|
Toggle Preview | Previews geometry that is open in Rhino, inside Revit |
Grasshopper Panel

|
Grasshopper | Open the Grasshopper Canvas in Revit |
→ Click: Launches Grasshopper window only |
||

|
Off | Turns off the real-time preview by Grasshopepr in Revit |

|
Wire | Grasshopper will use a wireframe display for real-time preview of geometry in Revit |

|
Shaded | Grasshopper will use a shaded display mode for real-time preview of geometry in Revit |

|
Disable/Enable Solver | Disables/Enables the Grasshopper solver |

|
Recompute | Forces a recompute to the loaded Grasshopper definitions |

|
Bake Selected | Bakes the currently selected Rhino Geometry into the currently selected Category in Revit |

|
Player | The Grasshopper Player will run any existing Grasshopper definition and immediately return to Revit |
Rhino Options
Rhino options window is easily accessible using the arrow-shaped button at the corner of the Rhinoceros panel
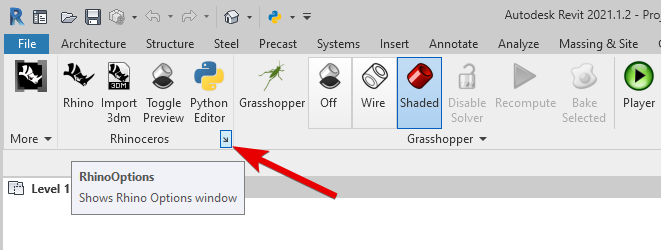
Rhino.Inside.Revit Options
Rhino.Inside.Revit Settings window has a series of options that can configure the Rhino.Inside.Revit behavior:
General Options
You can choose to Start Rhino automatically, and adjust other general settings from here:
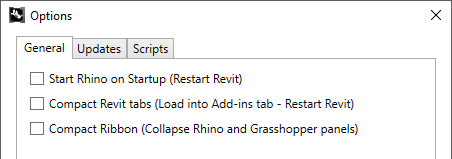
Checking for Updates
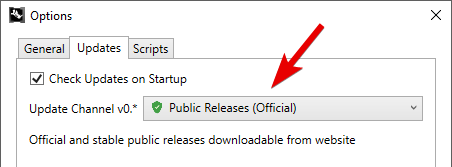
Update channels can be set here. You can subscribe to Stable Public updates or Daily (Work in Progress)
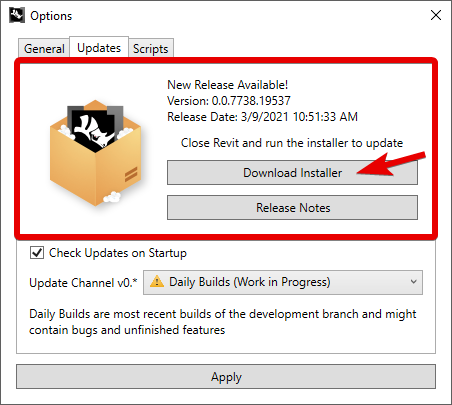
If there are any updates available, both the Start and Options buttons will show a notification dot and the new update release info on the tooltip:

You can get the information and download the installer from Options / Updates. Please make sure to close Revit before installing the new version.
Grasshopper Scripts
Grasshopper scripts can be loaded into the Revit UI. Create a directory on your machine that contains Grasshopper (*.gh or *.ghx) scripts. All the scripts at the root of this directory will be added as button to a new panel with the name of this directory. All other sub-directories will be converted into pull-down buttons on the ribbon.
The My RIR Tools panel shown in the image below is created from a directory of Grasshopper scripts:

Loading Grasshopper Scripts into Ribbon
This is an example of a directory (named My RIR Tools) with two Grasshopper scripts, and an Examples sub-directory with more Grasshopper scripts:

Now add the path to this directory inside the Rhino.Inside.Revit Options / Scripts:
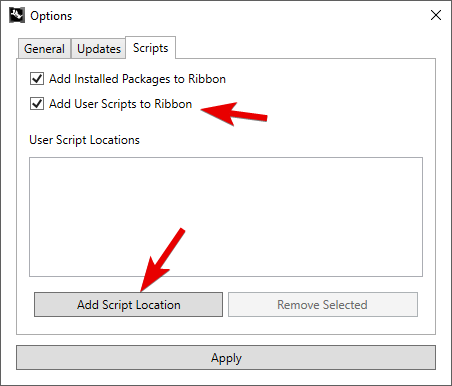
The “Use Script Locations” list will show all the directories that will be loaded into the UI:

Once settings are applied, the scripts will be loaded into the UI and are easily accessible:

Rhino Package Manager
Rhino package manager can be used to install Rhino and Grasshopper packages, and Rhino.Inside.Revit scripts.
